
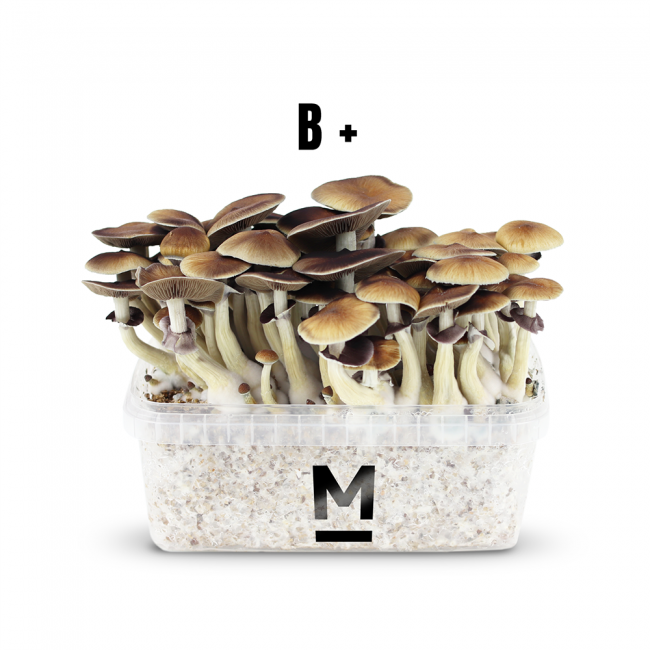
Magic Mushroom Grow Kit B+ from Mondo®
34,95 €
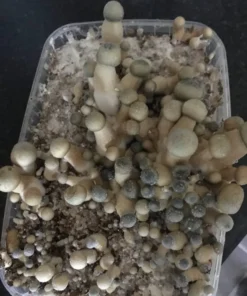
Grow your own B+ Magic Mushrooms with the Mondo® Mycelium Kit. Without a doubt, the Bee Plus is one of the largest of all Cubensis mushrooms in our collection.
Perhaps the B+ Magic Mushroom Grow Kit is even the most resilient. There are quite a few stories of people who discard the substrate in their garden after it’s used up, only to see B+ Magic Mushrooms growing in the same spot the following year.
The B+ Psilocybe Cubensis is a great beginner strain for growing and exploring new dimensions!
Mondo® B+ Magic Mushroom Grow Kit: Buy Next-Gen Kits in Europe
The Mondo® B+ Magic Mushroom Grow Kit represents the next generation of home cultivation for one of the most famous Psilocybe cubensis strains in the world. Engineered with improved substrate density and superior resistance to airborne contaminants, the updated Mondo® B+ delivers significantly larger yields, faster pinhead formation, and more consistent flushes than its predecessor.
Renowned for its adaptability and robust growth, the B+ strain produces large fruiting bodies with dark golden caps, making it the ideal choice for both beginner and experienced European growers.
Next-Gen Mondo® B+ vs. Traditional Grow Kits
The upgraded Mondo® B+ kit features key structural and substrate improvements designed to maximize total flush weight while simplifying the setup process.
| Feature / Metric | Next-Gen Mondo® B+ | Traditional Cubensis Kits |
| Contamination Resistance | Enhanced (Upgraded substrate formula) | Moderate |
| Initial Hydration | Mandatory 12-Hour Cold Soak | Varies by manufacturer |
| Sealing System | Reusable Yellow Seal Tab | Paperclips or standard tape |
| Days to First Pins | 5 – 16 Days | 7 – 21 Days |
| Average Harvest Weight | 100g – 300g fresh per kit | 100g – 250g fresh per kit |
| Expected Flushes | 2 to 4 Flushes (First 2 are largest) | 2 to 3 Flushes |
Pre-Colonized Active Substrate
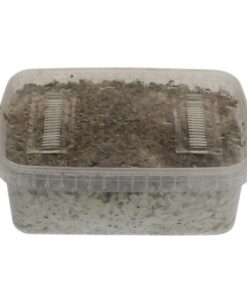
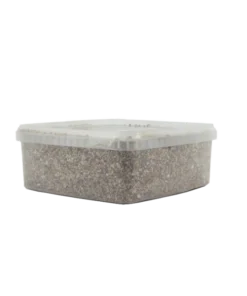
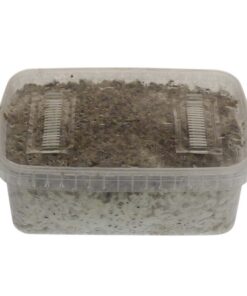
Each kit contains a 1200ml plastic tub packed with dense rye substrate fully colonized by active Psilocybe cubensis B+ mycelium. Prepared under strict laboratory standards, the cake arrives sterile and ready for activation.
Stealth Delivery Across Europe
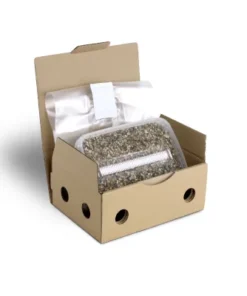
All shipments leave our Western European center in sturdy, unbranded boxes. Fast stealth shipping ensures your live mycelium stays healthy during transport to Germany, France, the Netherlands, Spain, Italy, and across the EU.
Step-by-Step Activation & Cultivation Guide
Follow this guide to activate your Next-Gen Mondo® B+ kit correctly and achieve maximum yield across all flushes.
| Step | Operation | Primary Task |
| 1. Workspace Sanitation | Disinfect & Protect | Clean work area; wear sterile gloves and a face mask. |
| 2. Initial Soak (12 hrs) | Substrate Activation | Fill tub with cold drinking water; submerge for 12 hours. |
| 3. Enclosure Setup | Bag Position & Seal | Drain water, place tub in bag, fold top, and apply yellow seal. |
| 4. Daily Humidity Care | Wall Misting | Spray inside bag walls 4 times daily (never directly on cake). |
| 5. Harvest & Reset | Pick & Re-Soak | Pick when veils tear; re-soak 12 hours in fridge for next flush. |
Step 1: Sanitation and Workspace Setup
Contamination from airborne mold spores or bacteria is the leading cause of kit failure.
-
Close all windows and doors to prevent drafts.
-
Clean your work surface thoroughly with a surface disinfectant spray.
-
Wash hands and forearms, apply hand sanitizer, and put on sterile latex gloves and a face mask.
Step 2: Activating Your Kit (12-Hour Soak)
-
Remove the plastic tub from the cardboard shipping box.
-
Fill the plastic tub completely with cold drinking water.
-
Snap the plastic lid securely onto the tub and submerge it for 12 hours (ideally inside your refrigerator at 2°C to 8°C).
-
After 12 hours, remove the tub from the fridge, open one corner of the lid, and drain all excess water completely.
-
Rinse the plastic lid, dry it, and store it safely inside the cardboard box for future flushes.
Step 3: Bag Assembly & Sealing
-
Place the open plastic tub inside the provided micron-filter grow bag with the bag opening facing upward.
-
Fold the top opening of the grow bag twice, ensuring you do not cover or block the micron filter strip.
-
Secure the fold using the included reusable yellow seal tab.
-
Place the setup back inside the cardboard box on top of the stored lid.
Environmental & Growth Parameters
Maintaining steady environmental conditions triggers uniform pinhead formation and accelerates harvest timelines.
| Climate Parameter | Optimal Range | Management Strategy |
| Ideal Temperature | 23°C – 24°C (73.4°F – 75.2°F) | Target zone for optimal growth. |
| Temperature Limits | 18°C (Min) – 29°C (Max) | Use a thermo heating mat if room drops below 18°C. |
| Lighting | Indirect ambient daylight | 4–12 hours daily; avoid direct sunlight completely. |
| Relative Humidity | 90% – 95% | Spray bag walls daily; ensure condensation remains visible. |
| Air Exchange | Once daily during misting | Unclip bag, spray walls, allow brief air exchange, and reseal. |
Temperature Control
Keep your grow kit at a stable temperature of 23°C to 24°C. If room temperatures drop below 18°C during European winter months, place an infrared thermo heating mat beneath the setup.
Important Setup Tip: Never place the grow tub directly onto a heating mat. Place an insulating spacer—such as a piece of folded cardboard or a wooden rack—between the mat and the box to prevent the bottom of the substrate cake from drying out.
Humidity & Misting Protocol
Starting the day after initial activation, open the bag daily to regulate moisture:
-
Spray the inner plastic walls of the bag once per side (4 sprays total daily).
-
Never spray water directly onto the substrate cake or growing mushrooms, as excess moisture on the mycelium can cause rot or aborts.
-
Reseal the bag immediately with the yellow seal tab after misting to retain humidity and introduce fresh oxygen.
Harvesting Technique & Resetting for Multiple Flushes
The Mondo® B+ kit produces mushrooms in distinct waves called flushes, with the first two flushes delivering the largest mushrooms and overall heaviest yields.
| Stage | Operational Action | Critical Indicator |
| 1. Timing | Harvest before spore drop | Pick as the protective veil between cap and stem begins to tear. |
| 2. Twist & Release | Gentle rotational pull | Hold stem base; twist slowly clockwise to release from cake. |
| 3. Substrate Clean | Remove aborts & pins | Clear all small premature pins to prepare cake for rehydration. |
| 4. Cold Soak Reset | 12-Hour Rehydration | Fill tub with cold water, cap lid, and soak 12 hrs in fridge (2°C–8°C). |
When to Harvest
Harvest your B+ mushrooms just as the thin veil beneath the cap begins to tear. Waiting too long causes caps to open fully and release dark purple/black spores across the cake. While spores are harmless, they signal the mycelium to slow down production and can reduce the yield of subsequent flushes.
Proper Picking Method
-
Sanitize hands thoroughly or wear fresh sterile gloves.
-
Grasp the base of the mushroom stem between your thumb and forefinger.
-
Twist your hand slowly clockwise while applying gentle upward pressure until the stem releases cleanly from the mycelium cake. Never yank or pull hard, as this damages the underlying cake structure.
-
Harvest all mature mushrooms along with tiny premature pins (“aborts”) before soaking for the next cycle.
Resetting for Next Flushes (Subsequent Soaking)
-
Fill the grow tub with cold drinking water and snap the sanitized lid back on.
-
Wrap the sealed tub in a clean plastic bag and place it in your refrigerator (2°C to 8°C) for 12 hours.
-
Hang the empty micron-filter bag upside down to dry safely.
-
After 12 hours, remove the tub from the fridge and drain all excess water completely.
-
Return the tub to the grow bag, spray the inner walls, seal with the yellow tab, and resume normal growing conditions.
Troubleshooting & Contamination Control
Preventing & Removing Side-Pins
Side-pins develop when light and humidity reach the sides of the plastic tub, creating a micro-climate along the edge of the cake.
-
Prevention: Wrap the outside bottom half of the plastic container with aluminum foil or black tape before setup to block light from reaching the sides.
-
Harvesting Side-Pins: If mushrooms grow on the side, sanitize your hands, invert the plastic box onto your clean hand so the cake slides out, pick the side mushrooms, and return the cake to the box before soaking.
Identifying Healthy vs. Contaminated Growth
-
White Mycelium with Brown Caps: Healthy growth structure.
-
Blue/Purple Tint on Stems: Harmless bruising caused by handling or direct moisture contact (psilocybin oxidation).
-
Green, Red, Grey, or Yellow Growth: Indicates bacterial or fungal contamination (such as Trichoderma green mold). If discolorations appear or no growth occurs for 3 weeks after a flush, dispose of the kit immediately in outdoor waste.
Frequently Asked Questions
How long does the Next-Gen Mondo® B+ kit take to produce mushrooms?
First pinheads typically emerge between 5 and 16 days after initial setup. You can expect to harvest your first complete flush within 10 to 21 days under optimal conditions.
What cumulative yield can I expect from a 1200ml Mondo® B+ kit?
A standard 1200ml kit typically yields between 100 and 300 grams of fresh mushrooms across 2 to 4 flushes, depending on environmental temperature and hygiene control.
Can I store the kit if I am not ready to start growing immediately?
Yes. If you cannot set up your kit right away, keep the unopened package sealed inside a plastic bag in your refrigerator at 2°C to 8°C. It can be safely stored for up to 2 weeks.
How do I close the Next-Gen Mondo® grow bag?
The Next-Gen Mondo® kit includes a reusable yellow seal tab. Fold the top opening of the micron-filter bag over twice (without covering the filter strip) and slide the yellow seal over the fold to lock in humidity.
Order Mondo® B+ Grow Kits Online in Europe
The Next-Gen Mondo® B+ Magic Mushroom Grow Kit combines high yield potential, fast colonization, and improved contamination resistance in one easy-to-use package. Follow the proper hydration and misting protocols to harvest multiple flushes of fresh B+ mushrooms at home.
Order your Mondo® B+ grow kit today and take advantage of fast, discreet stealth delivery across Europe.
Be the first to review “Magic Mushroom Grow Kit B+ from Mondo®”
Related products
Fresh Mushrooms Magic Mushroom Growing Kits
GetMagic Magic Mushroom Grow Kits
Fresh Mushrooms Magic Mushroom Growing Kits
Sterile magic mushroom substrate for p. Cubensis Extra Large
Buy magic mushroom growing kits from FreshMushrooms®
GetMagic Magic Mushroom Grow Kits
GetMagic Magic Mushroom Grow Kits
Fresh Mushrooms Magic Mushroom Growing Kits
Fresh Mushrooms Magic Mushroom Growing Kits
Reviews
There are no reviews yet.