
Uncategorized
How to Use a Magic Mushroom Grow Kit Step-by-Step: Maximize Your First Flush
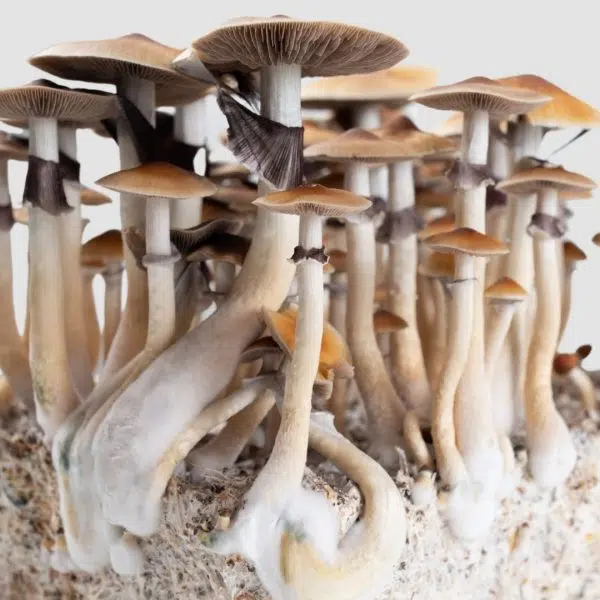
Nov
All-in-one grow kits make cultivating mushrooms accessible, but achieving a heavy, healthy first flush requires precise attention to environmental factors: hydration, air exchange, temperature, and humidity.
Whether you are using a standard fully-colonized substrate tub or a grow bag setup, this step-by-step guide walks you through every stage from initial soak to harvest.
Prerequisites: Sterile Workspace Preparation
Contamination is the most common reason a grow kit fails. Before opening your kit, prepare your environment:
- Clean your surface: Wipe down your work area with 70% isopropyl alcohol.
- Wash hands and wear gloves: Clean your hands thoroughly, put on disposable nitrile gloves, and sanitize them with alcohol.
- Turn off draft sources: Close windows, turn off fans, and switch off AC units 30 minutes prior to setup to reduce floating dust and mold spores.
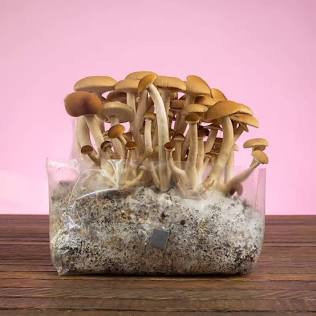
Step-by-Step Operation Guide
1.Step 1: Hydrate (Soak) the Substrate Block:Critical for activating dormant mycelium.
Mycelium requires significant moisture to produce fruiting bodies.
- Remove the lid from your grow kit cake (keep the lid clean for later flushes).
- Gently pour cold, clean tap water or mineral water into the tub until the substrate block is fully submerged.
- Put the lid back on and let the kit soak for 8 to 12 hours (or overnight) in the refrigerator.
Note: Some modern “Ready-to-Grow” grow kits come pre-hydrated. Check your manufacturer’s specific instructions—if your kit is pre-moistened, skip soaking for Flush #1 and go straight to Step 2.
2.Step 2: Drain and Position in the Grow Bag:Setting up the fruiting chamber.
- After soaking, wash and sanitize your hands/gloves.
- Take off the lid and carefully drain off all excess water. Hold the cake gently so it doesn’t slide out.
- Slide the tub into the provided micro-filter grow bag (or humidity tent).
- Pour 200–300 ml of lukewarm water into the bottom of the bag (outside the tub, not over the mycelium cake) to maintain atmospheric humidity.
- Close the top of the bag by folding it over twice and securing it with paperclips or a bag clip.
3.Step 3: Temperature & Lighting Setup:Creating the ideal microclimate (Pinning Phase).
Place your setup in an optimal environment to trigger pinhead formation:
- Temperature: Keep ambient room temperature strictly between 21°C and 25°C (70°F–77°F). Temperatures below 20°C stall growth; temperatures above 26°C invite bacterial contamination.
- Lighting: Store in indirect daylight or ambient room light. Never put the kit in direct sunlight, as heat build-up will dry out or cook the mycelium.
4.Step 4: Daily Maintenance (Misting & Air Exchange):Managing fresh air exchange (FAE) & misting.
Once tiny pinheads appear (usually within 7–14 days), start daily maintenance:
- Fresh Air Exchange (FAE): Open the bag 1–2 times daily for 10–20 seconds to wave fresh air into the bag. Carbon dioxide settles at the bottom, so replacing it with fresh oxygen triggers rapid mushroom development.
- Misting: If moisture on the inside walls of the bag dries up, mist the inside walls of the bag using a fine mister filled with clean water.
- Warning: Never spray water directly onto the mycelium cake or developing pins, as direct droplets can cause pin aborts.
5.Step 5: Harvesting Your Mushrooms:Timing the harvest before spores drop.
Mushrooms mature quickly once pinning begins—often doubling in size every 24 hours.
- Ideal Timing: Harvest right as the veil beneath the mushroom cap begins to tear or stretch. If you wait too long, the caps open fully and drop dark spores over the cake, signaling the mycelium to stop producing.
- Technique: Clean and sanitize your hands. Gently grasp the base of the mushroom stem, twist slightly, and pull upward. Avoid cutting stems with scissors, as remaining stump fragments can rot.
Environmental Conditions Quick Reference
| Parameter | Ideal Target | Risk of Out-of-Range |
| Temperature | 21°C – 25°C (70°F – 77°F) | Too low = Stalled growth / Too high = Bacterial contamination |
| Humidity | 90% – 95% | Below 85% = Drying out & aborts / 100% standing water = Mold |
| Light | 12 hours indirect daylight / standard room light | Direct sunlight = Overheating & drying out |
| Air Exchange | 1–2 times daily after pins appear | Low FAE = Long, skinny stems with tiny caps (“fuzzy feet”) |
How to Prepare for Subsequent Flushes
Grow kits produce multiple batches (flushes) from a single substrate cake:
- After harvesting every mushroom from the current flush, remove any tiny aborts or dead tissue remaining on top.
- Fill the tub with clean water again and let it soak in the fridge for 8 to 12 hours to rehydrate the cake.
- Drain completely, place it back into the sanitized grow bag, and resume Step 3.
Most quality grow kits will produce 3 to 5 flushes before nutrients are fully depleted.
Frequently Asked Questions (FAQ)
How long does it take for mushrooms to grow from a kit?
From setup to first harvest typically takes 10 to 21 days, depending on ambient room temperature and genetics. Once pinheads form, full-sized mushrooms usually mature within 4 to 7 days.
Why are my mushrooms growing long and skinny?
Long, thin stems with small caps are a classic sign of high carbon dioxide levels (insufficient Fresh Air Exchange). Increase how often you ventilate the grow bag each day.
What should I do if white fuzz appears at the base of the stems?
White, cottony growth at the very base of stems (“fuzzy feet”) is harmless aerial mycelium searching for fresh oxygen. Simply increase fresh air exchange slightly.
Conclusion
Maximizing your yield from a grow kit comes down to consistent environmental management: maintain steady temperatures (21°C–25°C), keep relative humidity high by misting the bag walls, and provide fresh air exchange once pinning starts. By handling your kit with clean hands and harvesting right before the veils break, you set your substrate up for multiple successful flushes.
